
Installing RO System: A Whole House Guide for 2026
You've got a whole-house reverse osmosis unit in the garage, a private well feeding the home, and a weekend picked out for installation. The temptation is to start cutting into the supply line immediately. On Southwest Florida wells, that's usually the wrong first move. Installing an RO system successfully starts with water testing, pressure verification, site planning, and selecting equipment that can handle the home's actual demand.
Cape Coral has unusually relevant RO history. The city became the first U.S. municipality to use reverse osmosis at scale in 1977, beginning with 3 million gallons per day, then expanding to 15 million gallons per day by 1985, when it was the world's largest low-pressure RO plant. This history of reverse osmosis helps put residential systems in perspective. RO isn't an experimental treatment method, but a mature technology that still requires careful sizing and commissioning.
For a private well, the installation conversation is different from an under-sink project. The system must serve fixtures, storage, pumps, pretreatment, and household demand as a coordinated package. The sections below explain what happens during a whole-house RO installation, where DIY work becomes risky, and why local water-treatment experience matters.
Preparing Your Home for Whole House RO Installation
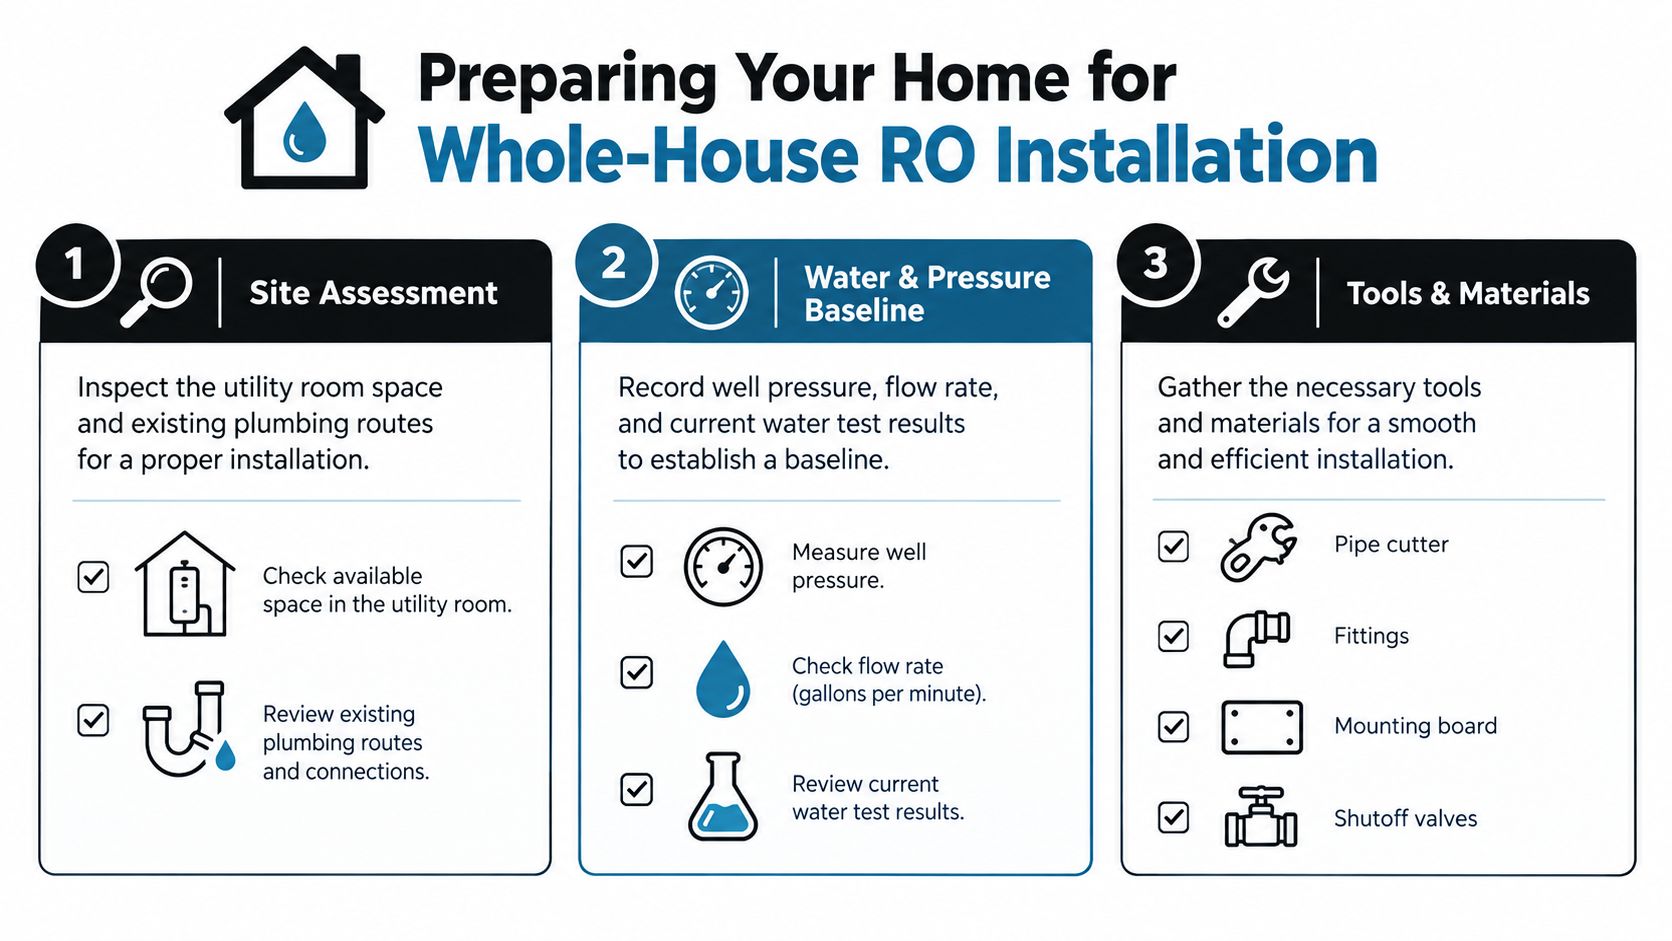
A homeowner on a Cape Coral well may open a new RO carton and see a straightforward weekend project. Before touching a fitting, treat the installation area as a technical worksite. Walk the route from the well equipment or main supply entry to the proposed RO location, then identify where treated water will leave the system, where concentrate water will discharge, and where the storage tank and controls can remain accessible.
The equipment shouldn't block the water heater, electrical panel, service valves, or filter housings. Leave enough working room to remove cartridges and inspect connections without dismantling unrelated equipment. A clean mounting board can keep the membrane housings, gauges, switches, and valves organized instead of leaving them suspended from unsupported tubing.
Establish the baseline first
Measure feed pressure at an accessible cold-water point before installation. Record the well-water TDS and hardness, and note odor, staining, sediment, or other conditions that may affect pretreatment. A pressure gauge capable of reading beyond the system's operating range is useful because a single reading doesn't always reveal how the well equipment behaves while water is flowing.
Check that the booster-pump location has a dedicated 110V GFCI outlet within reach. Confirm that shut-off valves operate cleanly, and look for at least six inches of straight pipe before the planned tie-in so turbulent flow doesn't disturb the sediment prefilter.
Stage the tools and components
A realistic toolset includes:
- Measuring and cutting: Adjustable wrenches, a tubing cutter, a hacksaw, a bucket, and a flashlight.
- Connections: A PEX crimp tool or compatible push-fit fittings, potable-water-rated thread sealant, and Teflon tape where the manufacturer permits it.
- Mounting: A drill with suitable hole saw bits and hardware for the mounting board.
- Testing: A pressure gauge, TDS meter, and clean towels for protecting O-rings and cartridges.
University guidance describes a comparable RO installation workflow, including cold-potable feed verification, faucet and drain work, flushing, pressure testing, and an air-gap or high-loop drain arrangement. This installation guidance for reverse osmosis systems also highlights common errors such as overtightening fittings, poor cabinet clearance, and inadequate drain protection.
Photograph the area from several angles, label hot and cold lines with painter's tape, and keep cartridges and fittings on a clean towel. If the well needs additional conditioning before RO, compare the system with a suitable water softener solution rather than asking the membrane to handle every water-quality problem by itself.
Choosing the Right Whole House RO Configuration
A Cape Coral homeowner may want better water at the kitchen faucet, or may need treated water throughout the property. Those are different projects. Point-of-use RO serves drinking and cooking water at selected taps, while whole-house RO must supply showers, laundry, bathrooms, ice makers, and other fixtures. The EPA's point-of-use RO specification distinguishes these applications from systems designed to treat most water used throughout a building.
Start with the well-water report and household demand, not the carton size. A whole-house design must match production capacity, storage, delivery pressure, pretreatment, and concentrate handling to the source. Southwest Florida well water can make those choices more demanding because feed TDS, hardness, temperature, and pressure affect membrane performance.
| Configuration | Daily Capacity | Best For | Storage | Typical Well-Water Match |
|---|---|---|---|---|
| Point-of-use RO | Limited to selected taps | Drinking and cooking water | Small dedicated tank or tankless design | Condos, kitchens, guest areas |
| Modular whole-house RO | Scalable across multiple membranes | Larger households and changing demand | Atmospheric storage with delivery pump | Variable well quality and higher demand |
| Tank-based whole-house RO | Centralized treated-water production | Homes seeking a traditional layout | Pressurized or atmospheric tank, depending on design | Stable feed quality with carefully matched capacity |
Modular systems offer room to adapt
Multiple membrane housings on a shared manifold allow a modular system to grow with demand. That can help when household use increases or the water report changes, but expansion still requires a proper review of membrane count, pretreatment, storage volume, pump selection, and reject-water handling.
A tank-based system may have a simpler layout, yet a simpler layout is not automatically the right one. A configuration that performs well on one well can struggle when pressure, temperature, hardness, or feed TDS changes. As operating pressure rises, permeate production generally rises and membrane rejection generally improves when other conditions remain constant. The designer must still keep the membrane within its operating specifications and provide suitable pretreatment.
Water Medic of Cape Coral commonly evaluates modular, multi-stage arrangements with pretreatment and post-treatment suited to demanding Southwest Florida well conditions. This is also where the installation conversation clarifies the service boundary. An under-sink reverse osmosis system can suit one treated faucet, while a whole-house system requires coordinated storage, pressure control, and distribution throughout the home.
What Happens During a Professional RO System Installation
Professional installation begins with staging, not improvisation. The technician brings the selected membrane housings, tubing, controls, fittings, mounting materials, and pretreatment components to the work area. The system is laid out so the feed, treated-water, concentrate, drain, electrical, and service paths are visible before the first connection is made.
The main supply is shut off, and pressure is relieved at a nearby cold-water fixture. The technician then creates the planned feed connection after the existing shut-off, using a properly sized tee and a service valve. A sediment prefilter is mounted where cartridges can be changed without reaching behind the equipment.
The equipment is mounted as a connected system
The booster pump is connected to the dedicated GFCI supply, and the pressure controls are checked against the manufacturer's specifications. A pressure switch manages pump operation, while a high-pressure switch helps protect the membrane housings from a dead-head condition.
Feed tubing runs from the prefilter to the membrane rack. The treated-water line runs to storage and the delivery side, while concentrate and reject tubing route to an approved drain arrangement with backflow protection. The exact layout depends on the equipment, but the principle remains consistent. Each line should be identified, supported, and accessible for service.
A point-of-use installation may include drilling a dedicated faucet through a sink or countertop. In a whole-house installation, that faucet may be unnecessary because the home's cold-water distribution is being supplied with treated water. The decision should follow the design, not a generic under-sink manual.
Installation principle: The membrane shouldn't be treated as the first component to install. Pretreatment, pressure control, storage, and drainage determine whether the membrane can perform reliably.
Before the membrane is opened and loaded, the technician pressurizes the upstream system gradually. The pump is tested, fittings are inspected under operating pressure, and the system is checked for moisture at every connection. A dry test catches assembly problems before the membrane is exposed to operating conditions.
Only after the upstream checks are satisfactory is the membrane installed and the system brought online. The first fill is deliberately slow, allowing the technician to observe cycling, pressure behavior, and storage response. This sequence also helps protect a thin-film composite membrane from unsuitable feed conditions and preventable commissioning mistakes.
Pressure, Code, and Why Local Expertise Matters
A whole-house RO installation on Cape Coral well water can look finished while still producing weak flow, poor rejection, or unsafe drainage. The working limits come from feed pressure, plumbing and backflow requirements, and source-water chemistry. Cape Coral's long history with reverse osmosis makes local experience useful, because well conditions and home layouts vary from property to property.
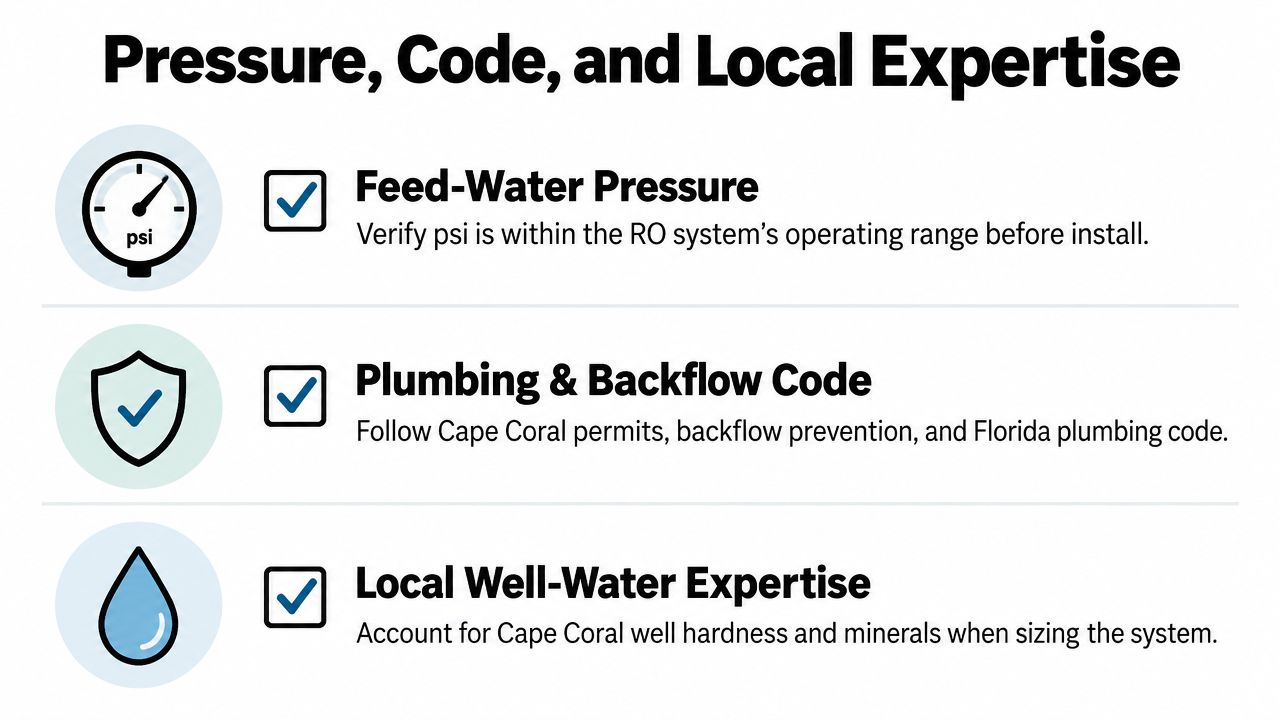
Pressure must match the equipment specification. Too little pressure slows production and can reduce contaminant rejection. Too much pressure places added stress on housings, fittings, and membranes. The correct target depends on the selected system, the pump, pretreatment, storage design, and the home's incoming supply. A technician checks pressure under operating conditions rather than relying only on a static gauge reading.
Code affects the layout
A whole-house RO system ties into the main distribution line, so the layout must account for approved materials, isolation valves, drain protection, electrical safety, and any local permit or licensing requirements. Air-gap or high-loop arrangements help prevent drain-side contamination from reaching treated water.
The EPA identifies NSF/ANSI 58 as the standard covering RO materials, design, construction, and performance. Its supporting statement also explains that plumbing codes address certification for point-of-use RO systems, while federal rules do not set one universal efficiency or performance requirement for every RO product. The EPA's supporting statement on RO systems helps separate certification from marketing claims.
A handyman may be able to mount equipment, but main-line tie-ins, electrical connections, permits, pressure management, and treatment commissioning can require specialized qualifications. Water Medic of Cape Coral approaches the job as a water-treatment installation, including pump selection and pressure control through its pump service. That distinction helps homeowners decide where DIY work ends and professional service begins, while protecting system performance, code compliance, and warranty conditions.
Flushing, Testing, and Confirming Your Water Quality
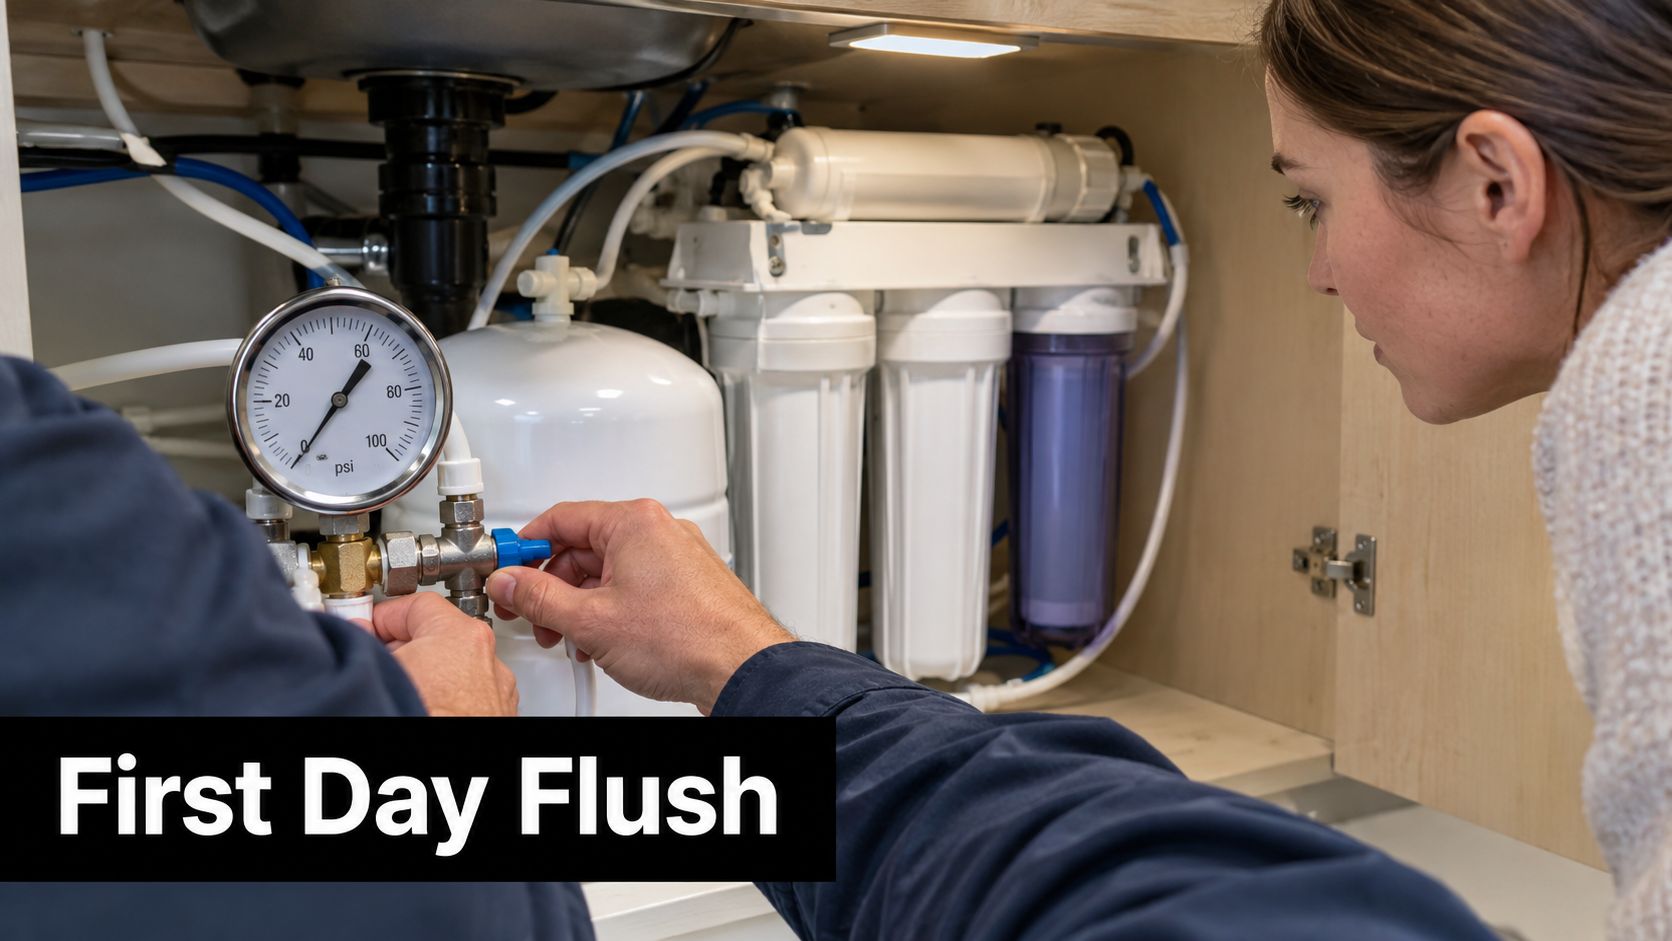
The first operating day should end with documented results, not a running pump. The technician opens the system slowly, listens for normal cycling, and watches pressure while the storage tank begins filling. Each fitting, drain connection, saddle, valve, and push-fit connection receives a deliberate inspection during this period.
A successful commissioning visit includes a leak-down inspection while the equipment is pressurized and again after the pump stops. The technician checks whether pressure holds as expected, confirms that the concentrate path is flowing correctly, and verifies that the automatic shutoff responds when the storage side reaches its operating condition.
Flushing comes before drinking
New membranes and filters require the manufacturer's flushing procedure. Many tank-based systems call for the first two tanks of permeate to be discarded to clear preservative and manufacturing residue. Independent RO guidance also recommends checking product water with a TDS meter and confirming a substantial reduction from the feed reading.
The technician takes a feed-water sample and a product-water sample under comparable conditions. Those readings are recorded alongside the membrane specification so the homeowner has a baseline for future service. The goal isn't to celebrate a number without context. It's to establish what the installed system produces on that particular well.
The handoff should be written down
At the end of commissioning, the homeowner should receive the normal valve positions, shut-off location, pump controls, filter information, and baseline TDS readings. The technician explains which sounds and cycling patterns are normal, which observations require a call, and how the storage system behaves during its first fill.
RO can reduce many dissolved contaminants, including lead, copper, chromium, chloride, sodium, arsenic, fluoride, radium, sulfate, calcium, magnesium, potassium, nitrate, and phosphorous, as summarized by NSF's explanation of water-treatment standards. A TDS reading is useful, but it isn't a complete contaminant test. Source-water testing remains important when a homeowner needs confirmation about a specific substance.
Maintenance Schedule That Keeps Your RO System Performing
A whole-house RO system needs a maintenance rhythm that follows the water moving through it. Sediment and carbon stages protect the membrane, the membrane controls dissolved-solids reduction, and the storage and delivery equipment determine whether treated water reaches fixtures consistently.
Use the manufacturer's schedule as the starting point, then adjust service based on pressure, TDS trend, water demand, and feed-water changes. A calendar reminder is helpful, but a deteriorating baseline is more informative than a date alone.
A practical service rhythm
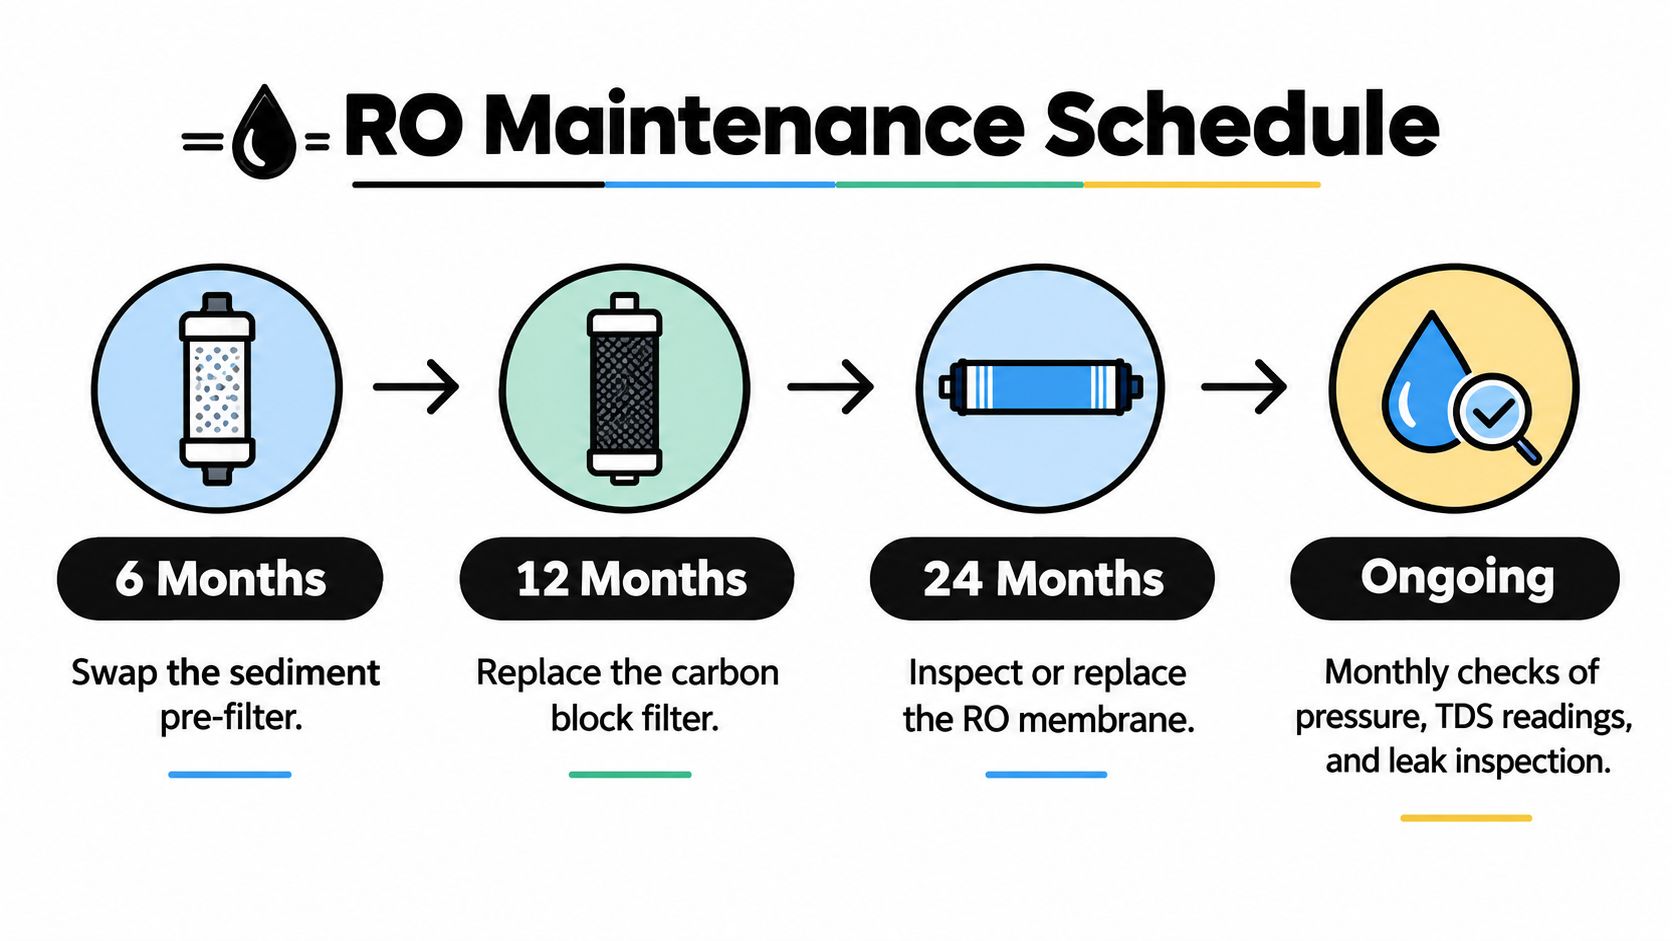
- At six months: Replace the sediment prefilter when the service plan or pressure readings indicate it. Sediment loading can restrict flow and make the booster pump work harder.
- At twelve months: Replace the carbon block according to the equipment specification. Carbon protection is especially important because membrane materials can be vulnerable to unsuitable disinfectant exposure.
- Every three to five years: Evaluate the membrane based on TDS creep, rejection performance, and operating pressure rather than replacing it blindly. The interval should follow measured performance and the manufacturer's recommendation.
- Annually: Sanitize the storage tank and related wetted components using the approved procedure and chemical concentration for the equipment.
- Monthly: Record feed and product TDS, inspect pressure behavior, and look over accessible connections and tubing.
The EPA's draft WaterSense specification provides useful design benchmarks for comparison. It calls for an automatic shutoff valve, requires storage-tank systems to meet minimum recovery and efficiency ratings of 30 percent, requires tankless systems to meet a minimum recovery rating of 30 percent, and includes a membrane-life test covering at least one year of performance. The draft RO specification isn't a substitute for the product manual, but it gives buyers meaningful features to ask about.
Service trigger: A sudden TDS increase, pump short-cycling, unexpected concentrate flow, or a permeate-side problem deserves diagnosis before someone simply changes a cartridge.
Homeowners can often replace accessible prefilters when the system is designed for it. Membrane loading, pump adjustment, tank sanitation, and unexplained performance loss are better handled by a qualified technician. The service record should show readings before and after the work, not just a list of parts installed.
Why Homeowners in Cape Coral Trust Water Medic for RO Service
Southwest Florida well water can demand more planning than a generic whole-house filter package. TDS, hardness, sediment, odor, pressure behavior, and household demand all influence the equipment that belongs in the treatment loop. A box-store system may appear affordable until the owner discovers that its production rate, pretreatment, storage, or pump doesn't match the property.
Water Medic of Cape Coral evaluates the well-water report and the installation location before recommending a configuration. The service conversation should include baseline TDS, pressure testing, storage needs, control access, and the maintenance plan. Those details make it possible to compare proposals on performance and serviceability instead of equipment appearance alone.
Local decisions affect long-term results
A whole-house RO installation isn't finished when the membrane housing is closed. The homeowner needs documented readings, clear valve labeling, accessible cartridges, and an explanation of what changes should prompt service. A specialist can also identify when RO needs support from pretreatment rather than allowing fouling or mineral loading to become a recurring membrane problem.
The broader technology has a long operating history. The practical RO membrane developed by Sidney Loeb and Srinivasa Sourirajan in 1959, followed by a patent filing in 1960 and a large-scale demonstration in Coalinga, California, in 1965, helped move RO toward real municipal infrastructure. UCLA's account of clean-water technology records how worldwide operating capacity later expanded from 880,000 gallons per day by the end of 1970 to 167,000,000 gallons per day by the end of 1976, and 524,000,000 gallons per day by 1984. The technology is established, but each home still needs a design matched to its source.
Water Medic provides whole-house reverse osmosis sales, installation, and repair for Cape Coral and surrounding Southwest Florida properties. The right next step is a water test, pressure check, site assessment, and written proposal that explains equipment selection and ongoing service rather than treating installation as a one-size-fits-all hookup.
Water Medic of Cape Coral can evaluate your well water, size a whole-house RO system, install the equipment, and document baseline performance after startup. Visit Water Medic of Cape Coral to request an assessment and discuss a configuration that fits your home, water quality, and maintenance expectations.