Your Guide to Well Water Pressure Tank Troubleshooting
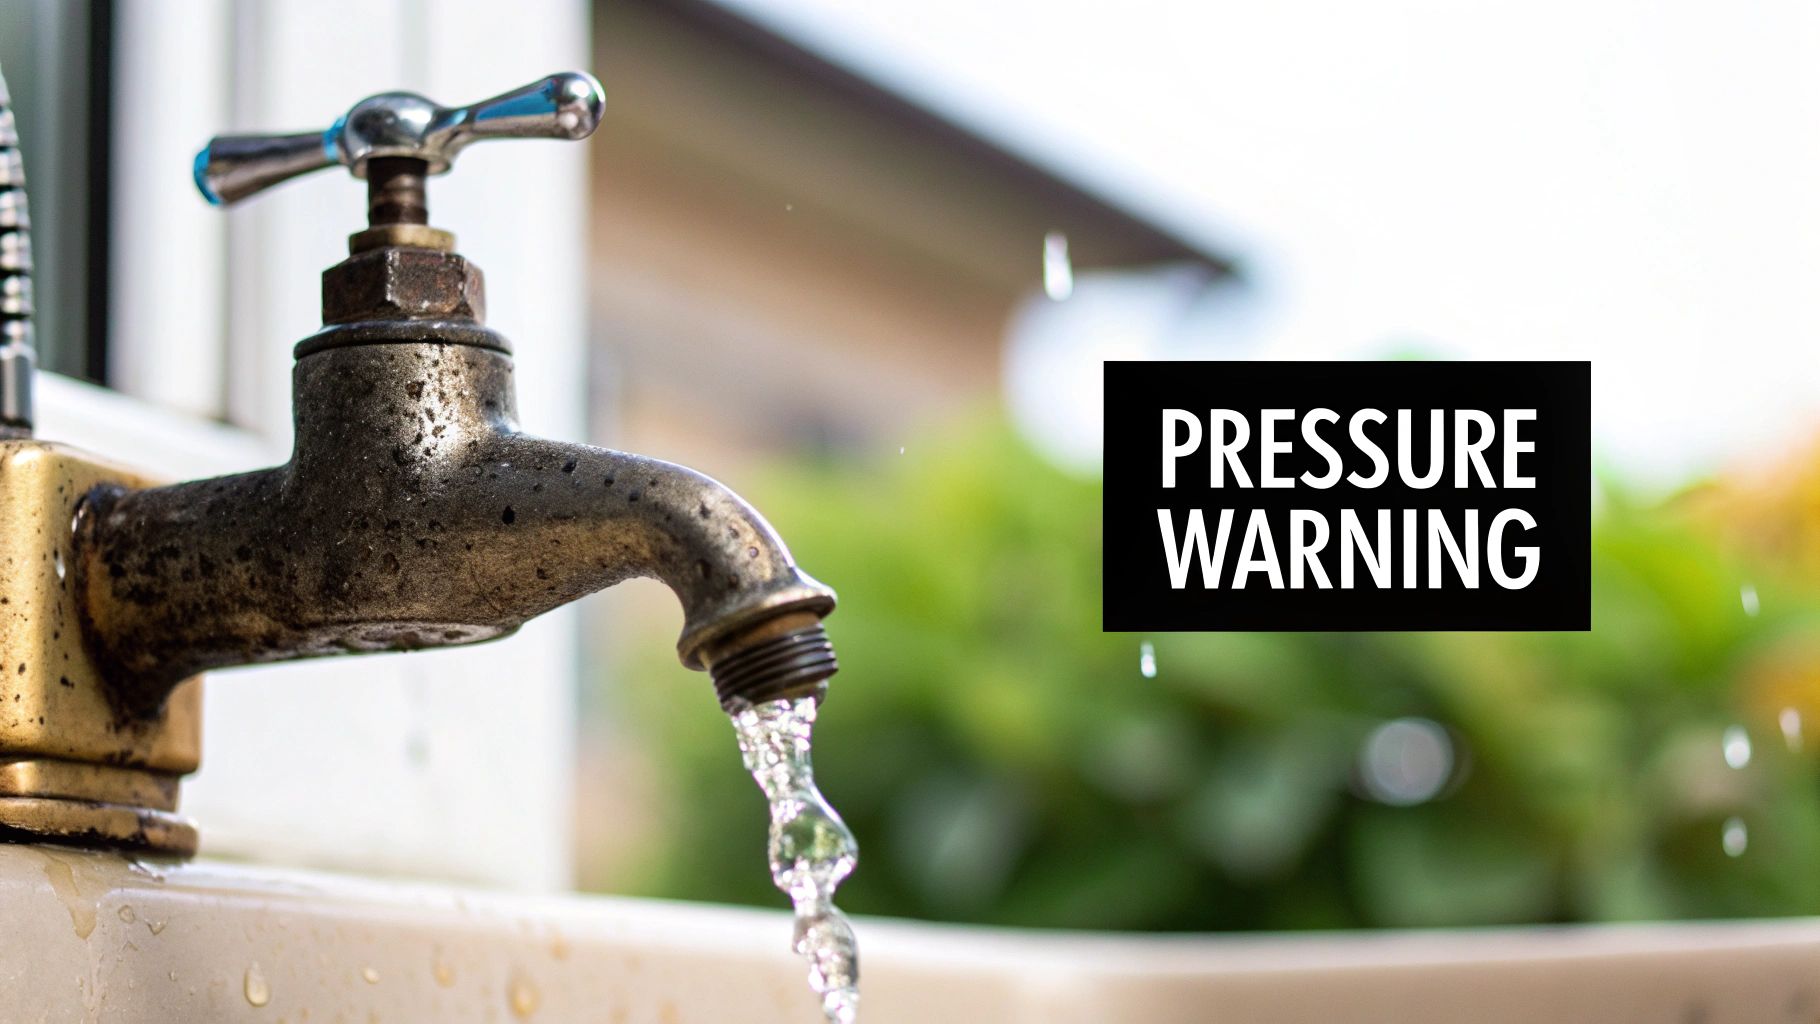
Is your shower pressure all over the place? Do your faucets sputter and spit air? If you're nodding along, chances are your well water pressure tank is trying to tell you something. These aren't just minor annoyances; they're the classic red flags that point to an imbalance of air and water inside your tank, and it's the first step in proper well water pressure tank troubleshooting.
Reading the Signs of a Failing Pressure Tank
Think of your pressure tank as the lungs of your well system. It holds a reserve of pressurized water, creating a crucial buffer that keeps your well pump from kicking on every single time you flush a toilet or wash your hands. This system doesn't just give you steady, reliable pressure; it also dramatically extends the life of that expensive pump.
When this critical component starts to go, the problems can range from a minor headache to a full-blown water outage. The key is to catch the issue early, before you’re standing in a soap-filled shower with no water. Knowing what to look for and listen for can save you a lot of money and frustration down the road.
Common Symptoms You’ll Notice
A pressure tank rarely dies in silence. It sends out distress signals you can see and hear in your day-to-day water use. For most homeowners, the first hint of trouble is an interruption to their normal routine.
Here are the most common signs that something is wrong:
- Rollercoaster Water Pressure: Does your shower suddenly go from strong to weak, then back again? This is a textbook symptom of a tank that can't maintain its air cushion.
- Sputtering Faucets: If you turn on the sink and get a blast of air before the water starts flowing properly, it often means the tank's internal bladder has failed, letting air sneak into your pipes.
- Rapid Pump Cycling: Listen for your well pump. If you hear it clicking on and off in short, frequent bursts—especially when you’re just running a little water—the tank is probably "waterlogged." This means it’s lost its air charge and is no longer holding a reserve.
- A Jump in Your Electric Bill: A pump that’s constantly running because of a bad tank will absolutely cause a noticeable spike in your energy usage.
A healthy pump should run for at least 30-60 seconds each time it kicks on to properly fill the tank. If yours is cycling on and off every few seconds, it’s being overworked and is on a fast track to burning out.
Why You Can’t Ignore These Signs
Putting up with weak water pressure is one thing, but ignoring these symptoms puts your entire well system at risk. The constant on-and-off cycling puts immense strain on the well pump motor, a far more complex and costly component to replace. A burnt-out pump means no water, period.
Learning to decode these signs puts you in control. You can move on to diagnosing the problem, and many common issues are surprisingly simple DIY fixes. Of course, it's just as important to know when to call for backup. If you’re dealing with any of these issues and aren't sure what to do next, our team provides professional well water repair services to pinpoint the problem and protect your system from more serious damage.
Diagnosing Symptoms and Their Root Causes
So, you know something's wrong with your water pressure. That’s the easy part. The real trick is connecting those strange noises and weird flows to the specific part that's failing. Think of your well system as a patient—every symptom is a clue pointing you toward the right diagnosis.
These issues rarely pop up out of nowhere. They're almost always the result of the delicate balance of air and water inside your pressure tank getting thrown off kilter. Let's dig into what these common symptoms are really telling you.
Before diving into specific problems, it helps to have a quick reference. Our expert technicians have put together this table based on the calls we get all the time. It connects what you're seeing and hearing at home with the most likely culprit in your well system.
Common Well Pressure Tank Symptoms and Likely Causes
| Symptom | What It Sounds/Looks Like | Most Likely Cause | What to Check First |
|---|---|---|---|
| Pump Cycles Constantly | The pump kicks on and off every few seconds, even for small water uses. | Waterlogged tank (lost air charge). | The air valve on the tank. |
| Sputtering Faucets | Faucets spit and hiss with air before a steady stream comes out. | Ruptured bladder or diaphragm. | Depress the air valve—if water comes out, the bladder is torn. |
| Weak or Fluctuating Pressure | The water pressure goes from strong to weak and back again. | Incorrect air pre-charge in the tank. | The tank's air pressure (when empty). |
| Pump Won't Turn On | You have no water at all, and the pump is silent. | Faulty pressure switch or electrical issue. | The pressure switch contacts and your circuit breaker. |
| Pump Won't Turn Off | The pump runs continuously, never reaching its cut-off pressure. | A significant leak somewhere or a failing pump. | The pressure switch and for visible signs of leaks. |
This table should give you a solid starting point. Now, let’s explore a few of these common headaches in more detail.
The Problem of Constant Pump Cycling
If your well pump is clicking on and off like crazy every time you wash your hands, you’re almost certainly dealing with a waterlogged tank. Honestly, this is the number one issue we see in the field.
A healthy tank has a pocket of compressed air that acts like a spring. It pushes water out to your faucets so the pump doesn't have to run for every little thing. When a tank is waterlogged, that air cushion is gone. The tank can no longer store pressurized water, forcing the pump to turn on for even the slightest demand.
This constant cycling is more than just annoying—it's actively destroying your pump. A pump that turns on and off more than 10-15 times an hour can see its 10-15 year lifespan cut in half, not to mention jacking up your energy bill by 25-30%. In an analysis of over 500 systems, a staggering 78% of low-pressure complaints were traced back to tanks causing the pump to run for less than 30 seconds at a time. The tank simply isn't doing its job.
Sputtering Faucets and Air in Your Lines
Do your faucets spit and hiss before finally giving you a steady stream? That sputtering is a dead giveaway that air is getting into your water lines. The usual suspect here is a ruptured internal bladder inside the pressure tank.
The bladder is just a heavy-duty balloon that keeps the air and water separate. When it tears, two things go wrong:
- The compressed air escapes from the tank and travels through your pipes, causing the sputtering you see at the tap.
- Water floods the air-side of the tank, which quickly leads to it becoming waterlogged and causing the rapid pump cycling we just talked about.
Here's a quick field test our technicians use all the time: Briefly press the pin on the air valve (it looks like one on a bike tire) on top of your tank. If you get a spray of water instead of just air, you've got a busted bladder. The tank is now toast and needs to be replaced—the bladder isn’t a part you can service.
Fluctuating and Weak Water Pressure
Water pressure that’s strong one minute and dribbling the next is incredibly frustrating. This yo-yo effect is almost always caused by an incorrect air pre-charge in the tank. This is the base air pressure inside the tank before any water enters.
This setting has to be just right—specifically, 2 psi below your pump's cut-in pressure. For a common 40/60 pressure switch, that means the pre-charge should be 38 psi. If it's too high, the tank can't fill with enough water, causing short pump runs. If it's too low, the bladder stretches too far and can tear.
Low pressure is a big red flag, and while the tank is often the problem, it helps to understand what causes low water pressure in your home from other potential sources, too.
Diagnosing these problems means looking at the whole system—the tank, the switch, and the well water pumps themselves. If you've spotted these symptoms but aren't comfortable with the next steps, getting a professional diagnosis can save you a lot of time and money by making sure you fix the right problem the first time.
Where to Start: A Few Simple Checks You Can Do Yourself
Before you can fix a problem with your well system, you’ve got to figure out what’s actually going on. Just like a doctor wouldn't prescribe medicine without a diagnosis, you shouldn't start replacing parts without a clear idea of the root cause. It's a surefire way to waste time and money.
The good news is, a few simple checks can tell you almost everything you need to know. All it takes is a couple of basic tools and a little bit of your time. Let's walk through how to safely troubleshoot your pressure tank.
First thing's first—safety. Water and electricity are a dangerous mix, so this step is not optional. Go to your circuit breaker panel, find the double-pole breaker labeled for your well pump, and flip it to the OFF position. Don't touch a single thing on your well system until you've done this.
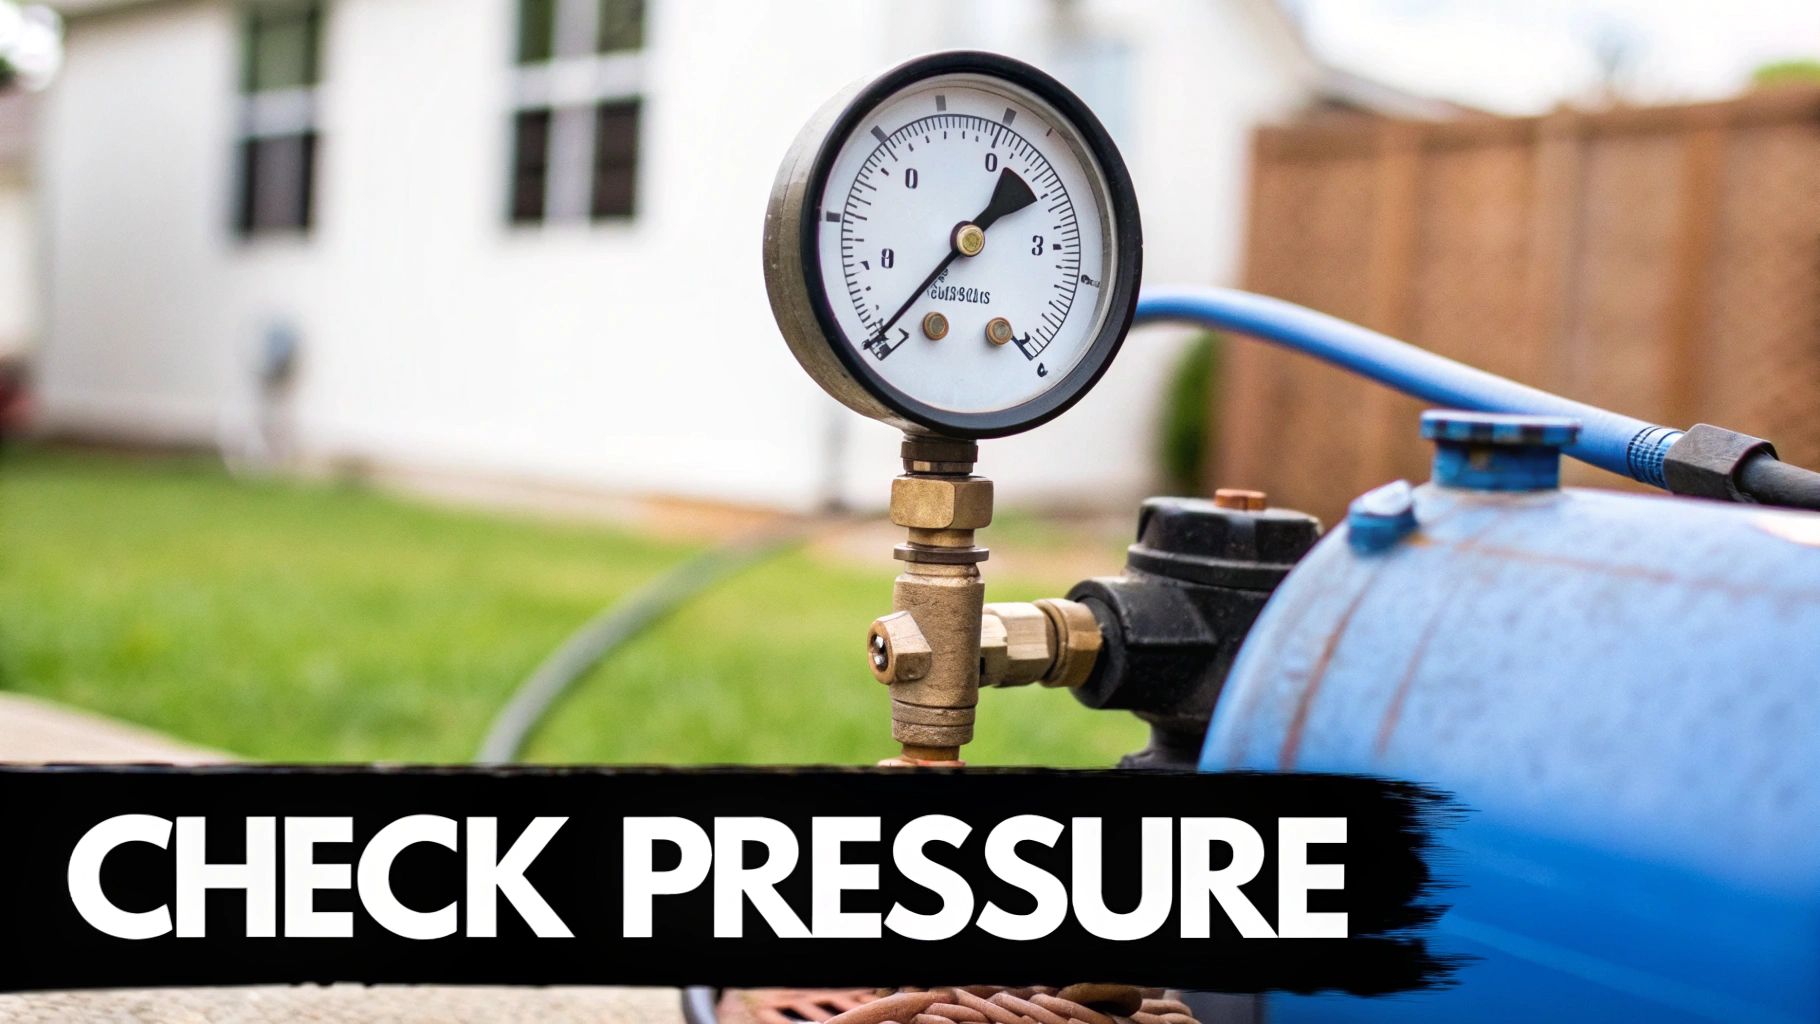
Checking the Tank's Air Pressure
The single most common culprit behind well pump problems is an incorrect air charge in the pressure tank. This is your number one suspect, and it's easy to check. You'll just need a standard tire pressure gauge.
Before you can get an accurate reading, you have to get all the water out of the tank. The easiest way is to open a faucet somewhere—an outdoor spigot or a laundry sink is perfect for this. Let the water run until it's down to a trickle and then stops completely.
Now, find the air valve on your pressure tank. It looks just like the one on a car tire and is usually on the top, hidden under a little plastic cap. Unscrew the cap, press your gauge on firmly, and check the pressure.
Here’s the key: the air pressure in an empty tank should be 2 PSI less than your pump's cut-in pressure. So, if you have a common 40/60 pressure switch, the tank's pre-charge should be right at 38 PSI. If it's way off, or if water spits out when you press the valve, you’ve found your problem. A low reading means you've lost air, which is why your pump is short-cycling. Water coming from the valve means the internal bladder has failed, and it's time for a new tank.
The Old-School Tap Test
Sometimes, the simplest tricks are the most effective. The "tap test" is a surprisingly accurate way to tell if your tank is waterlogged, and you don't need any tools at all.
With the system full and the pump off, just use your knuckles to tap on the side of the tank. Start at the very top and work your way down.
- A healthy tank will have a clear, hollow ring to it on the top portion. That's your air cushion.
- As you tap your way down, the sound will suddenly turn into a dull, solid thud. That’s where the water starts.
- A waterlogged tank will sound like a dull thud from top to bottom. There's no air left in there—it's all water.
This quick check can tell you in seconds if you've lost your air charge. If it sounds solid all the way up, that's almost certainly why your pump is kicking on and off constantly.
A Quick Look at the Switch and for Leaks
While the power is still off, use the opportunity to give everything a quick visual inspection. Check out the pressure switch—that little gray box mounted on the plumbing near the tank. Look for any signs of scorching, heavy corrosion on the contacts, or obvious damage.
Next, give the tank and all its plumbing connections a thorough once-over. You’re looking for:
- Drips or Puddles: Any leak, no matter how small, can cause pressure to drop and force the pump to cycle.
- Rust and Corrosion: Pay special attention to the bottom of the tank. A lot of rust is a major red flag that the tank's integrity is failing.
- Heavy Sweating: If the tank is always covered in condensation, it’s a classic symptom of being waterlogged.
Believe it or not, most issues are simple. Data from the National Ground Water Association suggests that 70% of troubleshoots end with a simple air recharge, which can save you an average of $800 on a professional service call. However, things like severe corrosion are serious—they compromise the tank's ability to hold pressure safely. For a deeper dive into how these components work together, it's worth exploring more information on pumping systems.
DIY Fixes Versus Knowing When to Call a Professional
So, you've gone through the diagnostic checks and have a few clues about what's going on with your well tank. Great! Some of these issues are perfect for a weekend warrior to tackle, giving you the satisfaction of fixing it yourself. But other problems are clear signs that it’s time to hang up the tools and get an expert on the phone. Knowing the difference is crucial—it can save you a ton of time, frustration, and money on a botched repair.
The most common (and satisfying) DIY fix is recharging a waterlogged tank. If your tests showed low air pressure but you didn't get any water sputtering out of the air valve, you're in luck. A simple recharge with an air compressor can often get your system back in sync, stopping that annoying rapid pump cycling and restoring steady pressure. It’s a pretty straightforward job that most homeowners can handle confidently.
But here's a big "however"—a successful recharge that only lasts for a little while is a major red flag. If you find yourself having to drag the compressor out every week or month to add more air, you're just treating a symptom. This almost always points to a slow leak or, more likely, a ruptured internal bladder. That’s a whole different ballgame.
When to Put Down the Tools
While we're all for rolling up your sleeves and fixing things, some problems really do need specialized knowledge and equipment. Pushing forward on your own when you're out of your depth can turn a small issue into a catastrophic failure for your entire well system.
Consider these scenarios your "stop sign" to call for professional help:
- You're Constantly Recharging It: Like we just talked about, if you have to repeatedly add air, the tank's bladder is almost certainly toast. This isn't a repair job; it requires a full tank replacement, which is best left to a pro.
- Water Sprays From the Air Valve: If even a tiny bit of water comes out of the air valve when you check the pressure, the diagnosis is confirmed. The bladder is breached, and the tank is beyond a simple fix.
- You See Significant Rust or Corrosion: Heavy rust, especially around the base or the seams of the tank, means its structural integrity is compromised. A rusty tank is a ticking time bomb and needs an expert evaluation immediately.
- The Pressure Switch Looks Burnt or Damaged: Any scorch marks, melted plastic, or heavily corroded contacts on the pressure switch scream "electrical hazard." If you suspect any electrical malfunctions, it's wise to get professional help, like 24/7 electrical troubleshooting and repair services.
This flowchart gives you a quick visual path to follow, helping you move from one diagnostic step to the next.
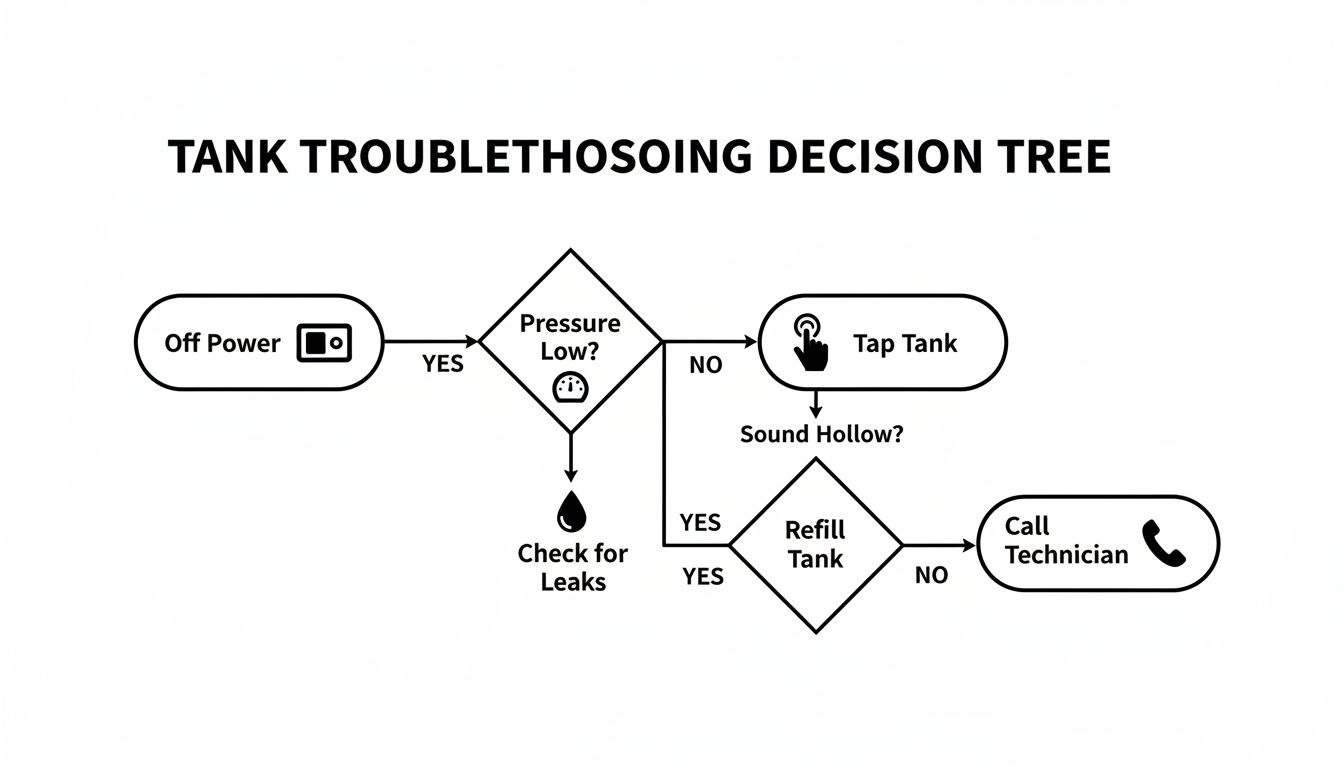
Following this logic helps you figure out if you're dealing with a simple air charge problem or something more serious that needs a trained eye.
The Value of an Expert Diagnosis
Sometimes, the real issue is hiding just beneath the surface. A well pressure tank is built to last between 5 and 15 years, but that lifespan can get cut short by hard water or a lack of maintenance. In fact, a National Ground Water Association survey found that 62% of homeowners ended up replacing their tanks within 12 years.
A failing tank doesn't just die quietly—it can cause the well pump to short-cycle, drastically accelerating wear and tear. Some studies show pumps failing 40% sooner in these conditions, leaving homeowners with a surprise replacement bill averaging $1,200 to $2,500.
A professional technician does more than just fix what's broken. We diagnose the entire system. We can tell if an undersized tank is burning out your pump or if your water quality is causing parts to fail prematurely. This ensures you get a permanent solution, not just a temporary patch.
Our technicians come equipped with the right tools to measure your system's performance and pinpoint the true cause of the failure. This keeps you from wasting money on fixes that don't last or, even worse, replacing the wrong component.
When you’re up against a stubborn problem or just want the peace of mind that comes with a professional diagnosis, we’re here to help. You can schedule our expert well water repair services to get a clear answer and a solution that lasts.
Proactive Maintenance to Extend Your System's Lifespan
The best way to handle well water pressure tank troubleshooting is to avoid it altogether. It's far better to stay ahead of problems with a simple maintenance schedule than to react when your water suddenly stops working. This kind of proactive care is the single best thing you can do to extend the life of your pressure tank and, just as importantly, protect your expensive well pump from burning out.
A little preventative maintenance really does go a long way. When it comes to well systems, the old saying "an ounce of prevention is worth a pound of cure" couldn't be more true, especially when the "cure" is a weekend emergency call and a bill for a new tank.
Your Annual DIY Check-Up Routine
You don't need to be a master plumber to keep your system in good shape. Setting aside just a bit of time once a year can give you a clear picture of your well system’s health and help you spot red flags before they become major headaches. Think of it as a yearly physical for your water system.
Here’s a straightforward routine you can follow:
- Check the Pre-Charge Pressure: This is your most critical task. Once a year, kill the power to the pump, drain the tank completely, and check the air pressure with a standard tire gauge. The goal is to have it 2 PSI below your pump's cut-in pressure (for example, a 40/60 switch needs a 38 PSI pre-charge). If it's low, top it off with a bicycle pump or a small air compressor.
- Give It a Visual Inspection: Take a good, close look at the tank. Check the seams and the base for any signs of rust or weeping moisture. Examine all the fittings and plumbing connections for drips. A tiny leak you catch now can save your pump from constantly cycling on and off.
- Examine the Pressure Switch: With the power still off, pop the cover off your pressure switch. You're looking for insect nests, heavy corrosion on the electrical contacts, or any signs of scorching or melted plastic. Any of these are clear signs the switch is on its last legs and needs a professional's attention.
Your pressure tank does more than just hold water; it's the primary line of defense for your well pump. By making sure the tank holds its air charge correctly, you prevent the constant on-and-off cycling that can destroy a pump motor years before its time.
How Water Quality Impacts Your Tank
Don't underestimate the role your local water quality plays in your tank's lifespan. If you have hard water with a lot of minerals like iron and calcium, it can be tough on your equipment. Sediment builds up inside the tank, clogs the delicate parts of the pressure switch, and can even wear down the internal bladder over time.
This is why a whole-house sediment filter is such a smart investment. It catches sand, silt, and other gunk before it ever gets to your pressure tank, water heater, and faucets. It's like a bodyguard for the most expensive parts of your plumbing system and can easily prevent premature failures.
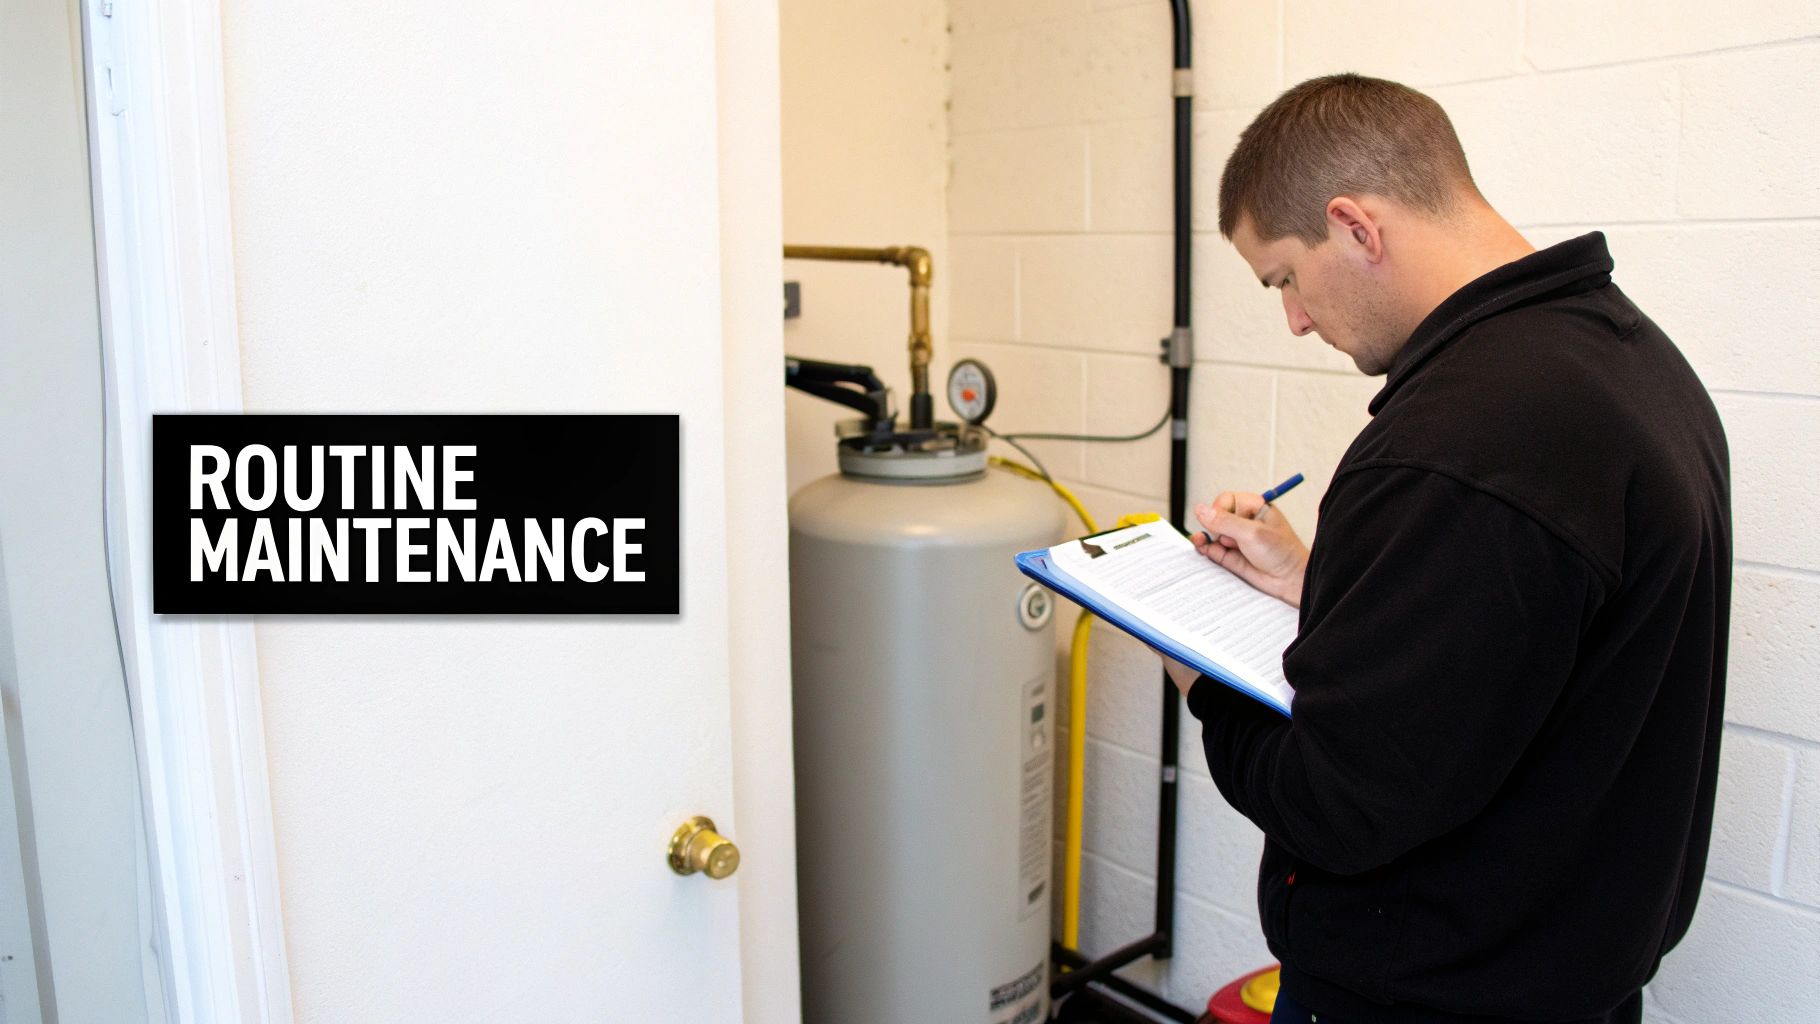
For Ultimate Peace of Mind: Professional Maintenance
While a DIY check-up is a fantastic start, it can't fully replace a trained eye. Our professional maintenance service offers a much deeper diagnostic. A technician won't just check the air pressure; they’ll also test the pump’s amperage draw, precisely calibrate the pressure switch, and assess the overall efficiency of your well system.
This complete health report can uncover hidden problems that are silently stressing your equipment. To ensure your system is in peak condition and protect yourself from the cost and hassle of an unexpected breakdown, take a look at our professional maintenance plans.
Common Questions About Well Pressure Tanks
Even with the best guide in hand, you're bound to have questions when you start digging into your well system. That's completely normal. Getting the right answers is what helps you decide whether to tackle a fix yourself or bring in an expert. We get these questions all the time from homeowners, so let's walk through the most common ones.
Think of this as a way to round out what we've already covered, giving you the confidence to take the right next step for your well.
How Can I Tell if My Pressure Tank is Waterlogged?
A waterlogged tank is, without a doubt, the number one cause of a short-cycling well pump. The most obvious sign is hearing your pump kick on and off rapidly—we're talking every few seconds—anytime you run a faucet. If that's happening, you've almost certainly found your problem.
For a quick confirmation, try the "tap test." With the pump off, give the tank a solid tap near the top, then another near the bottom. A healthy tank will sound hollow on top (that's the air) and solid on the bottom (that's the water). If it thuds with a solid sound all the way up, it’s full of water and has lost its air cushion.
Another tell-tale sign is constant "sweating" or condensation on the outside of the tank. If you've tried recharging the air but the problem comes right back, the internal bladder has likely failed. That's a clear sign it's time to call a pro for a replacement.
What's a Normal Reading for the Pressure Gauge on My Well Tank?
Your well system lives its life between two pressure points: the cut-in pressure, which tells the pump to turn on, and the cut-out pressure, which tells it to stop. These settings are programmed into the pressure switch, and you'll typically see ranges like 30/50 psi, 40/60 psi, or 50/70 psi.
As you use water and the tank refills, you'll see the needle on the pressure gauge travel between those two numbers. When everything is quiet and the pump is off, the gauge should be sitting at or very close to the higher number (the cut-out pressure, like 60 psi).
But here’s the crucial part: the tank's pre-charge pressure. This is the air pressure inside the tank when it's completely empty of water. It must be set to 2 psi below the cut-in pressure. So, for a 40/60 psi system, the air pre-charge needs to be exactly 38 psi. Getting this number wrong is a primary cause of system problems.
Is Replacing a Well Pressure Tank a DIY Job?
Technically, yes, a homeowner with serious plumbing skills could replace a pressure tank. But honestly, we strongly advise against it. There are just too many risks involved.
First off, safety. You're working with a very heavy tank that holds water under pressure, not to mention the electrical connections and your home's main water line. A mistake here isn't just a small leak; it can lead to major flooding, property damage, or even a dangerous tank failure.
Second, getting the size right is absolutely critical for the health of your well pump. An undersized tank will burn out your pump, while an oversized one is just a waste of money. A professional can properly assess your home's water demand and your pump's output to match you with the perfect tank.
When our team does an installation, we make sure every fitting is leak-proof, the pressure switch is perfectly calibrated, and the new tank has the correct air charge from the get-go. It’s about peace of mind and making sure your new equipment runs efficiently for years.
When your troubleshooting hits a wall, the experts at Water Medic of Cape Coral are here to take over. Our technicians have seen it all and can get any well system issue diagnosed and fixed right, making sure your home has the safe, reliable water you depend on.
For professional well water repair and maintenance, contact us today.